|
How to Replace Your Timing Chain |
| Home |
| Bio diesel and WVO page |
All parts used in these pictorials are available at the diesel parts for sale page
How to replace your timing chain on the 617 engine
One of the most disastrous things that can happen to your engine, is a timing chain failure while running. At best you are looking at a few bent valves and a whole lot of labor. At worst you can crack your head and camshaft assembly and other assorted goodies. The best advise I can give, is treat this as a PREVENTIVE maintenance item. It is not a hard job to do before the engine is destroyed. So with that being said, lets actually see how the procedure is done. This procedure was done by Mat Cama at Old World Automotive. So follow along as we install a new timing chain.......
Safety and security tips:
Please remember to recycle all your used fluids at an appropriate recycling center. Be mindful to not spill or splash fluids on yourself, others or the ground. Also as a safety tip please remember anytime you are working on, around or under your car, to wear safety glasses and secure the car with wheel stops and approved jack stands!
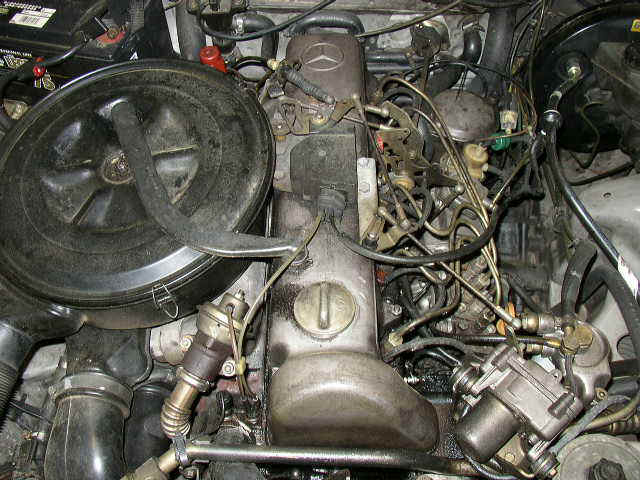
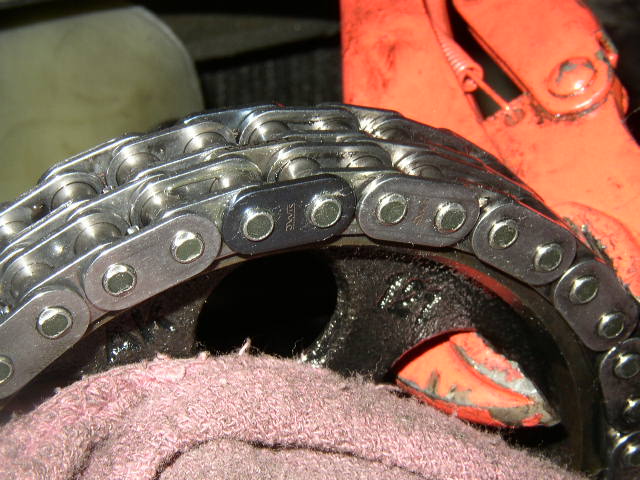
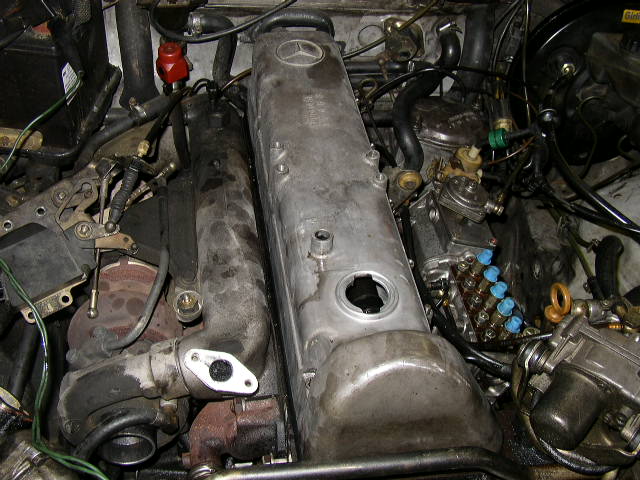
Normal garden variety 617 turbo diesel engine with 270k and the ORIGINAL timing chain. Don't let you car go this long!
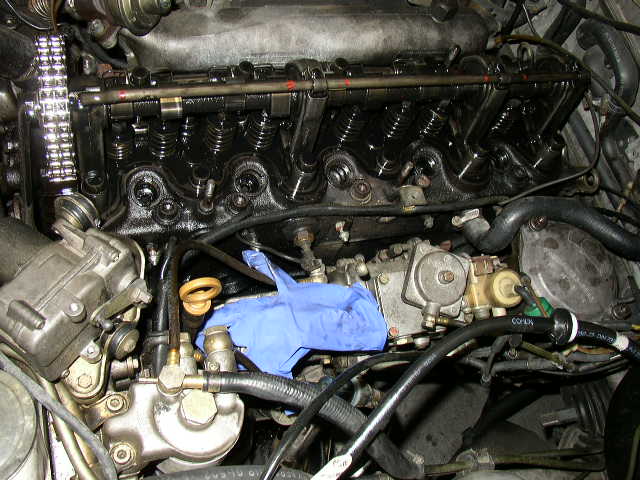

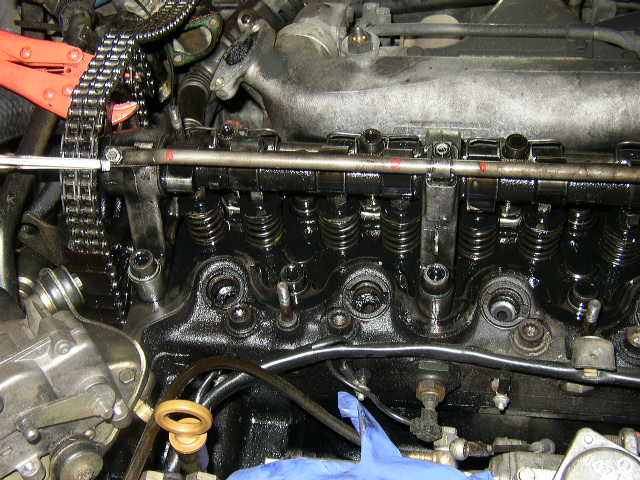
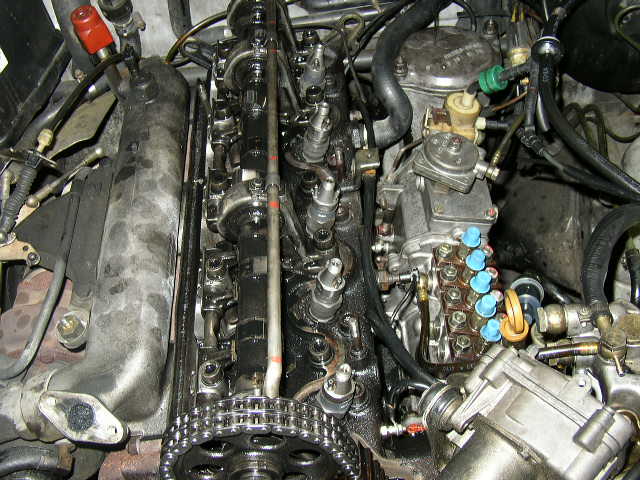
Remove the valve cover, linkage, air cleaner assembly, injectors, and fuel lines.
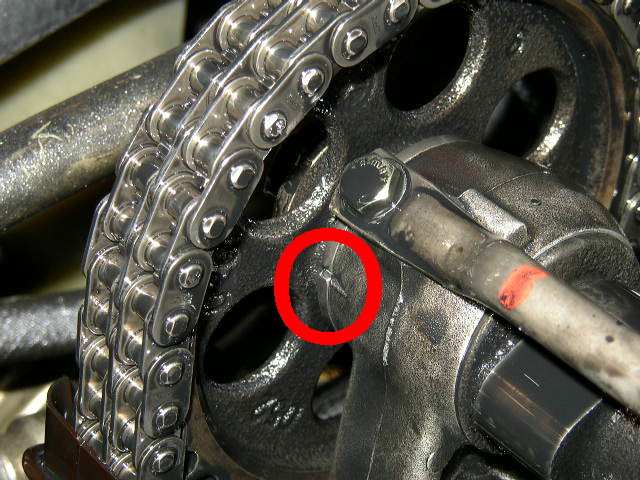
Line up the timing marks on the camshaft gear and the cam tower. An easy way to rotate the engine without using the crank bolt, is to use the power steering pulley bolt. If the belt is tight enough, it easily turns the engine over. ** Only rotate in the running direction which is clockwise.
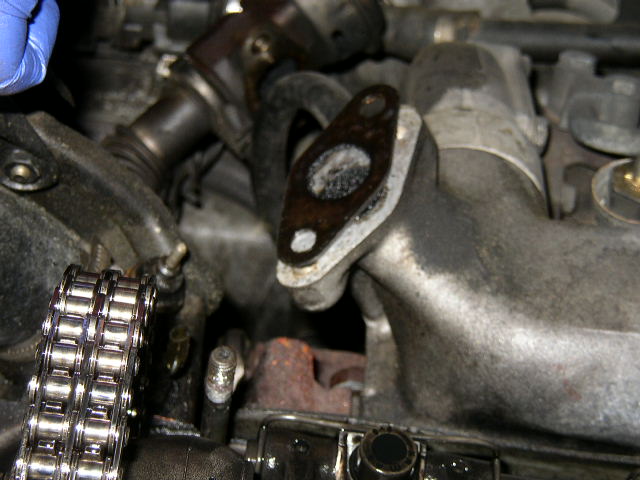
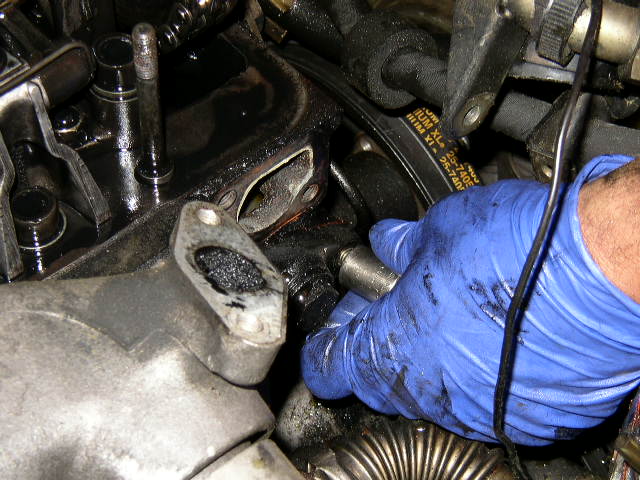
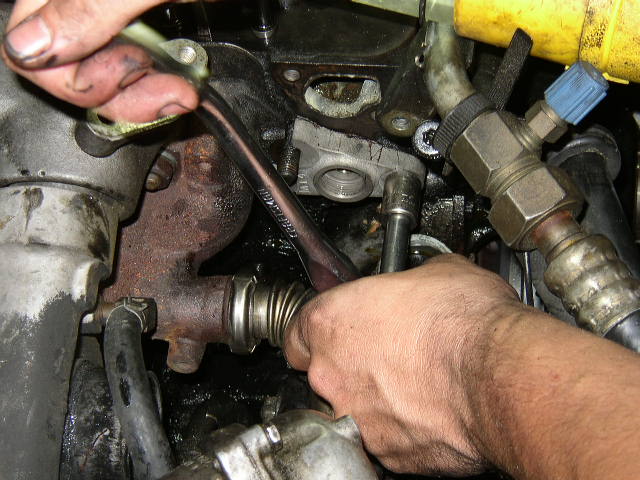
Remove the EGR assembly.....
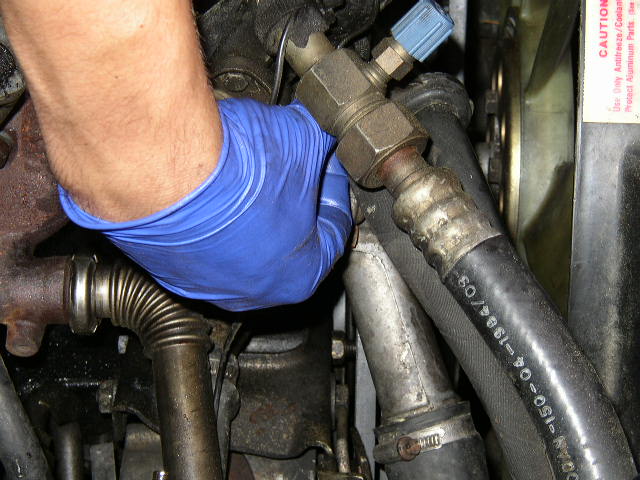

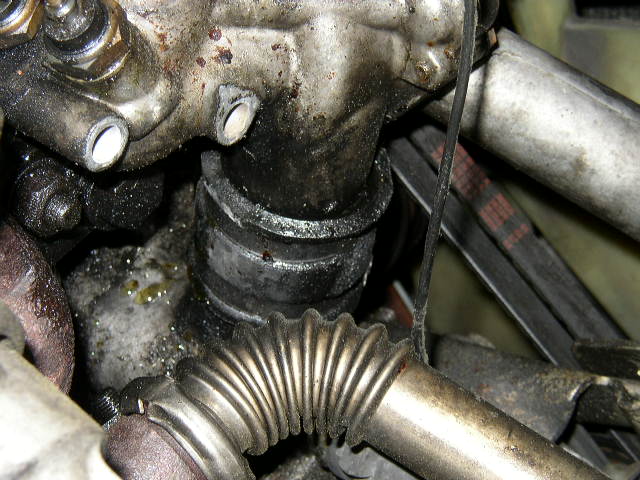
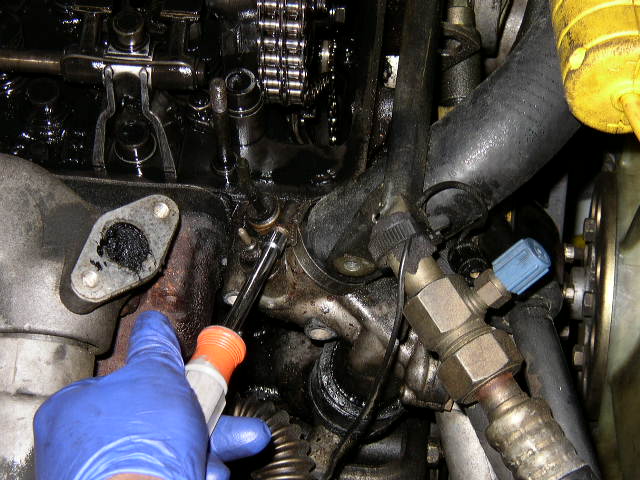
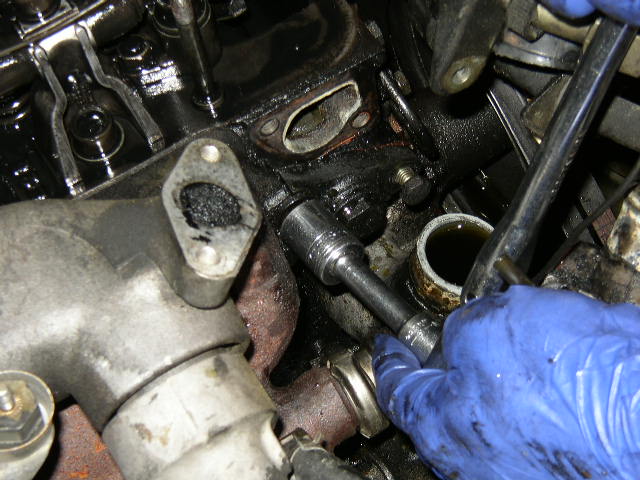
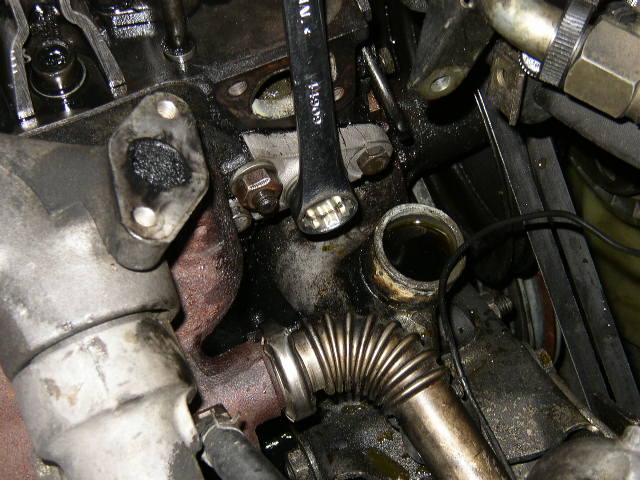
Remove the thermostat housing. This is a great time to install that new thermostat you have been putting off, along with the proper Mercedes coolant. Go ahead and do a citrus flush while you are at it.
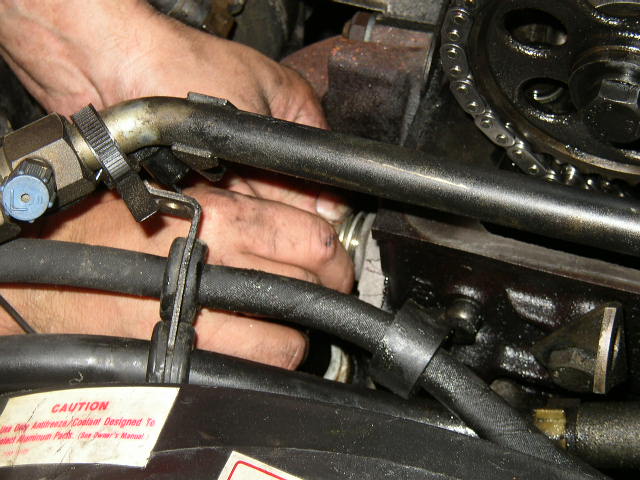
Remove the bracket that hold the upper A/C line. Do not discharge the A/C!
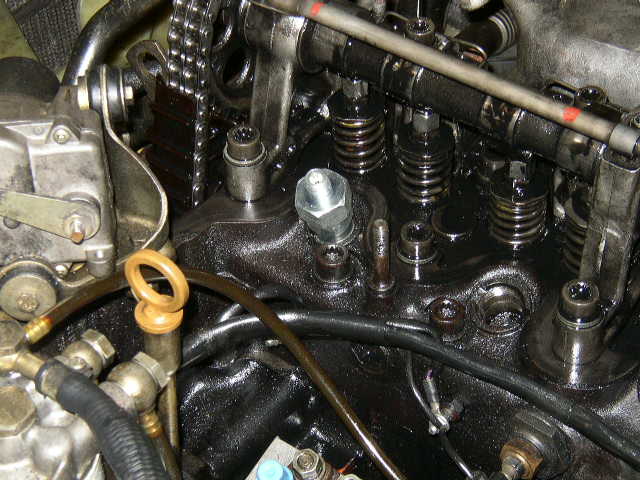
Remove the timing chain tensioner. A few bolts and its out. Make sure to use a NEW chain tensioner and spring. Never re-use the old unit.
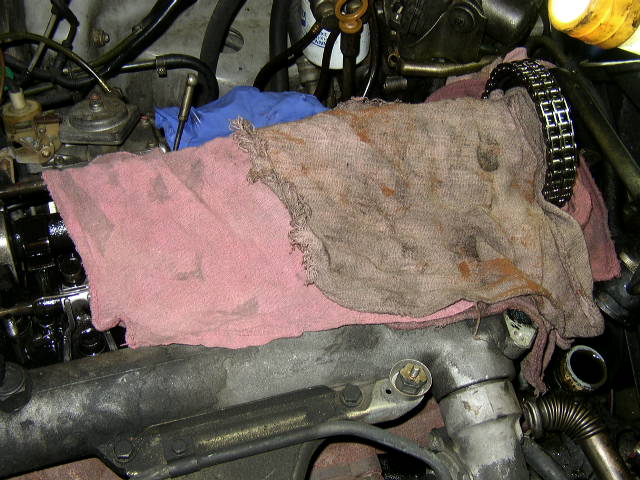
Now take some clean shop rags and cover the valve train and all the crevices near the chain. Basically any where the removed link could and will fall. If you drop it into the engine, you have a BIG problem, and yes you will CRY! I know they don't look it, but the rags are clean and have been washed.
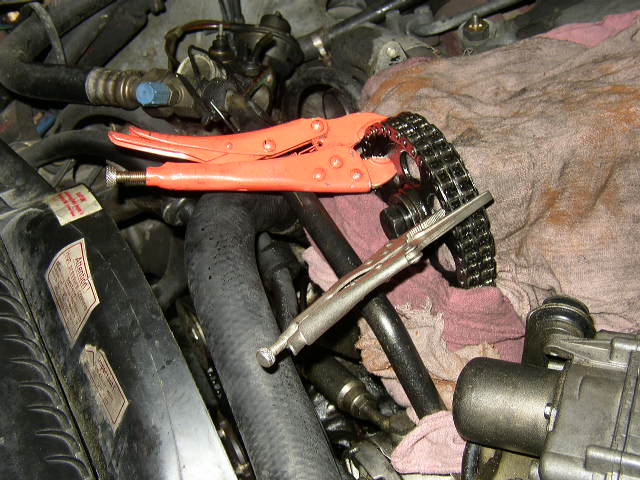
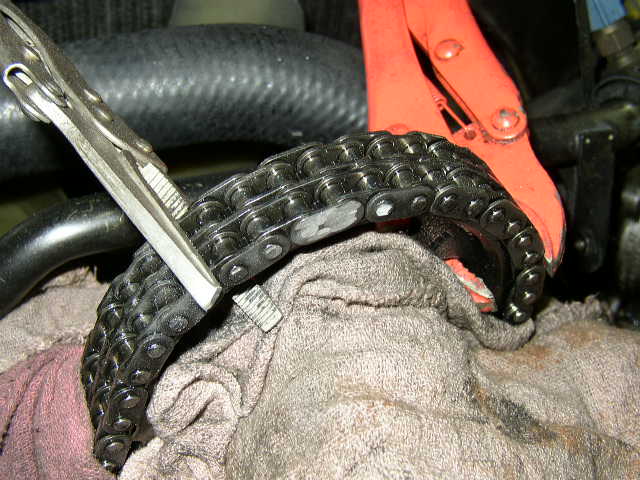
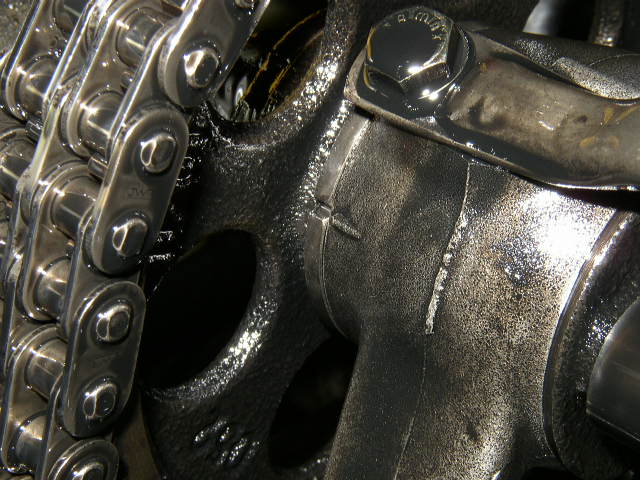
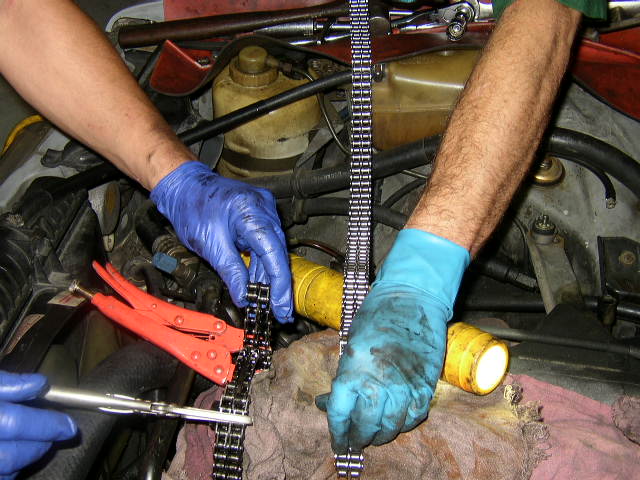
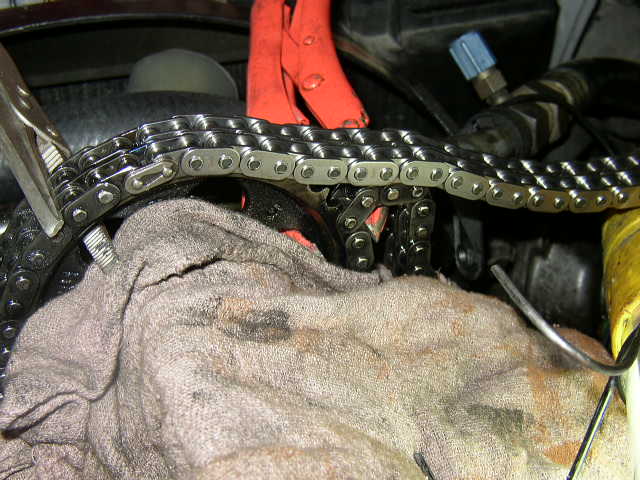
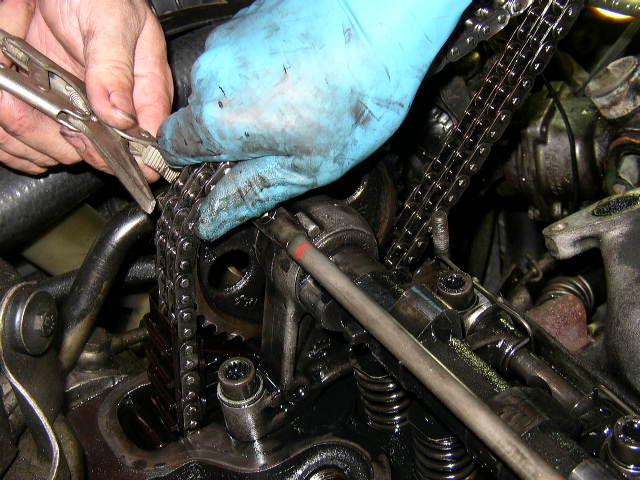
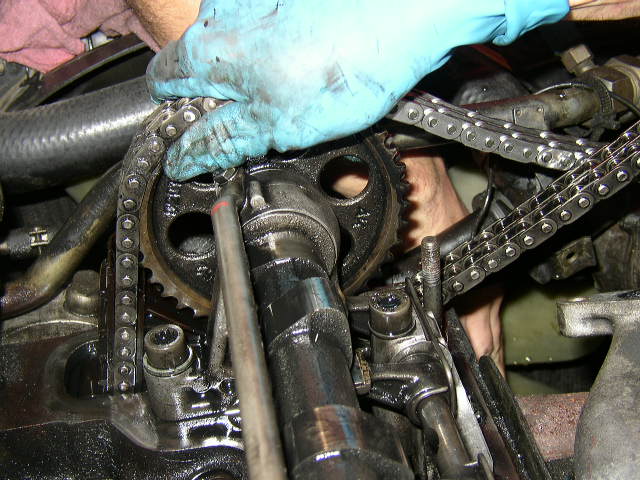
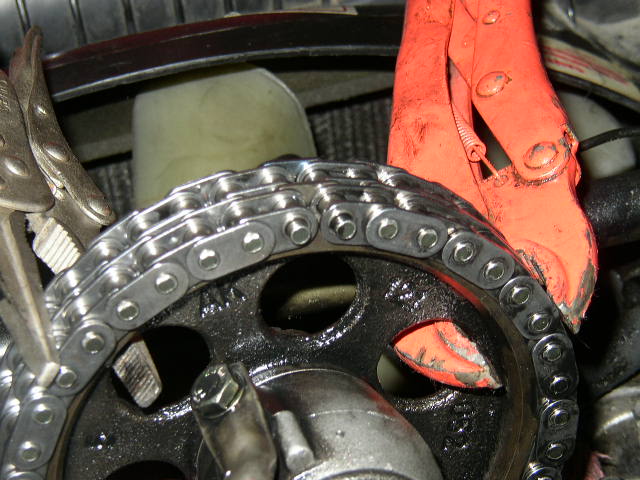
Now take a minimum of 2 vise gripe pliers and clamp the chain to the gear in the position shown.
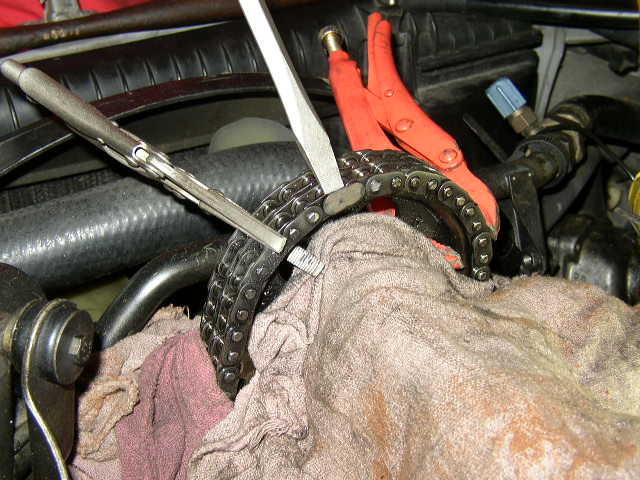

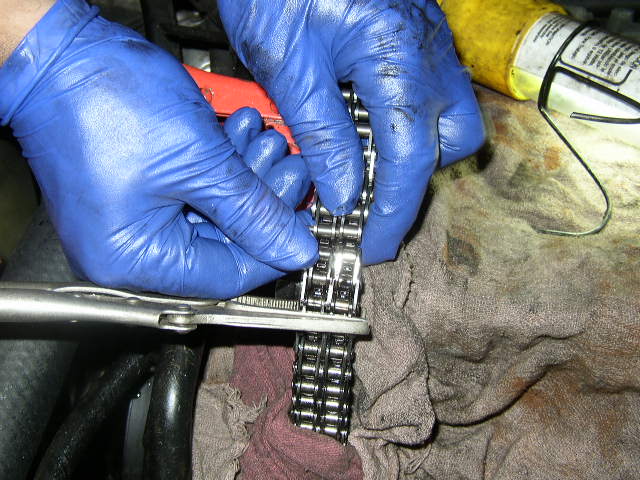
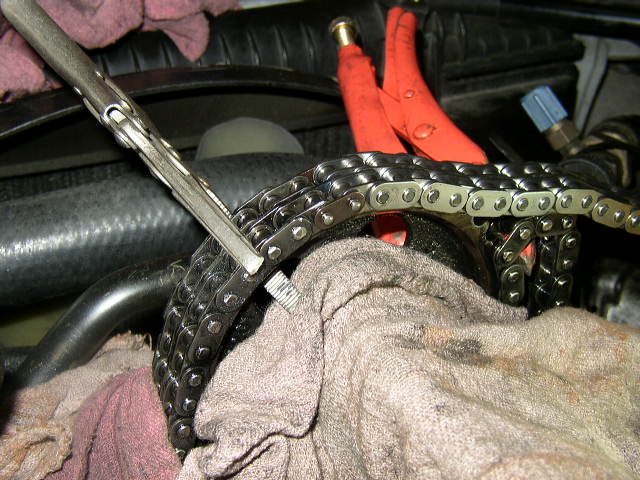
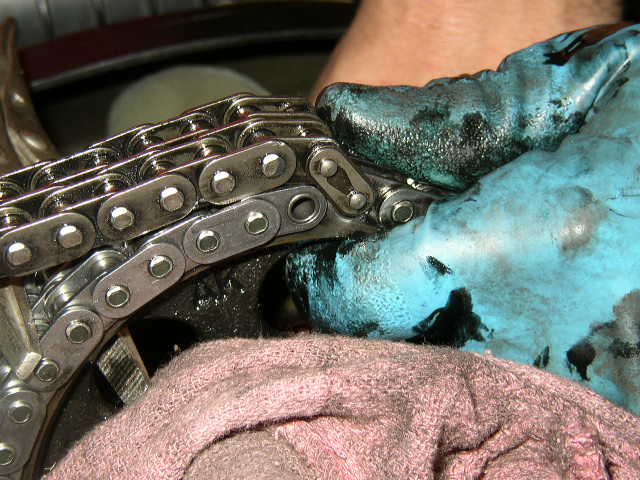
You will now need to grind the heads off the pins of one of the links. Use a dremel or air grinder. Your goal is to grind the heads down, so the link will pop off. It does not matter which link, just choose one. Then VERY carefully and slowly, use a screwdriver to gently pry it off the chain. Don't let that little sucker fall into the engine. Using too many rags is better than having it fall into the engine.
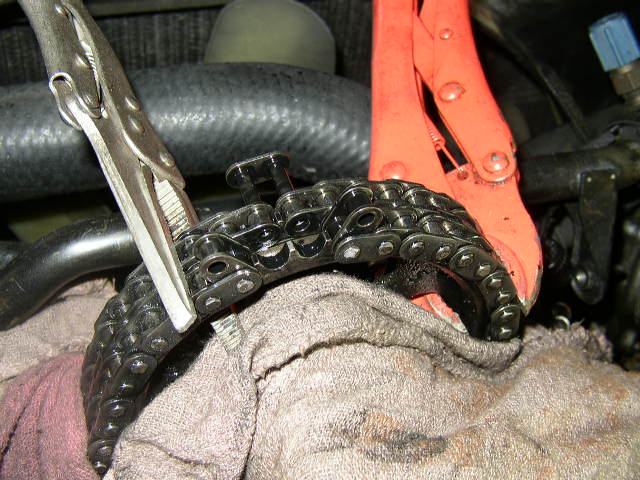
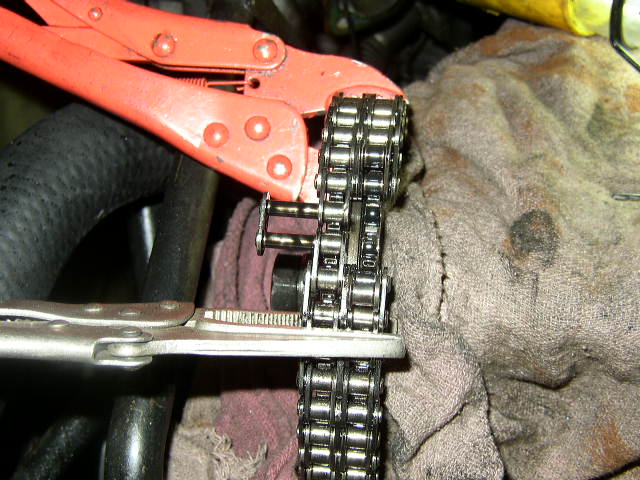
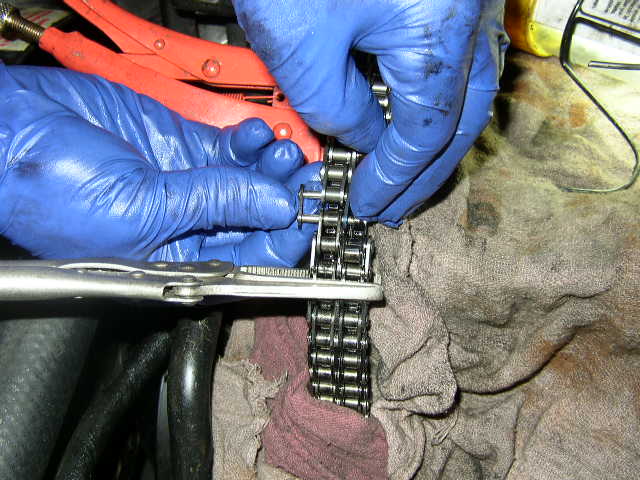
As you can see the link is being removed from the chain. Do not do this unless the 2 vice grips are securely in place. Remember since this is a double chain, you will have 2 bars. One on the outside of the chain, and one on the inside of the chain.
The new length of chain is stretched out and ready to be installed. The new chain is attached to the old chain on the drivers side and will be "rolled in". The other end of the old chain on the passenger side must be held taught and guided out. This job is best done with a helper.

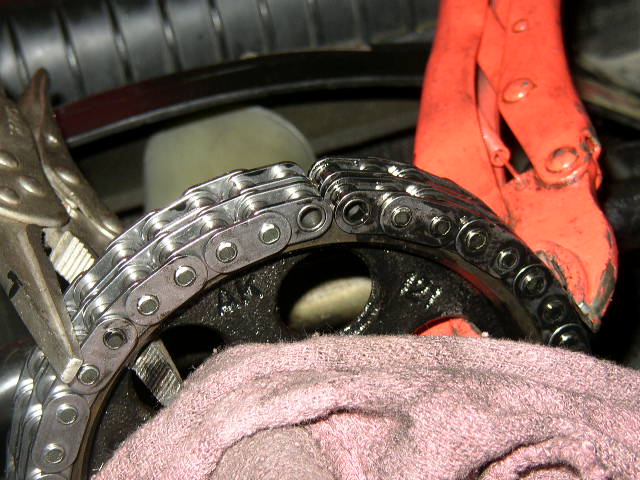
Secure the chain with a master link and clip. The clip for the master link is only for a temporary hold. Do not install the clip as permanent on your new chain. It will not hold up in the diesel engine. The new link must be pressed on the new chain, as you will see later. Since the engine will be rotated clockwise, the old chain will pull the new chain in the engine and out the other side...hopefully.
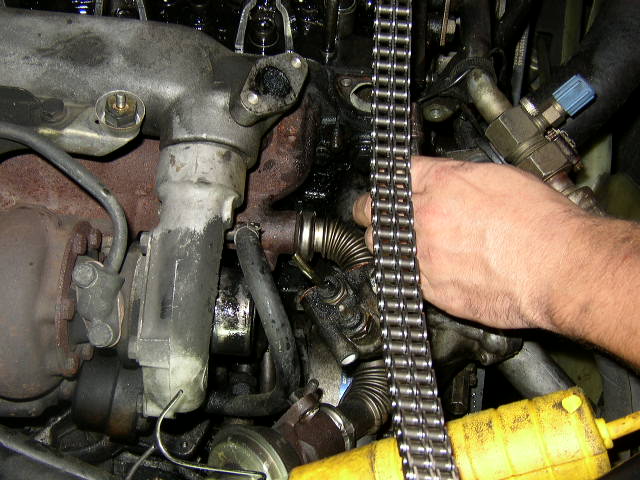
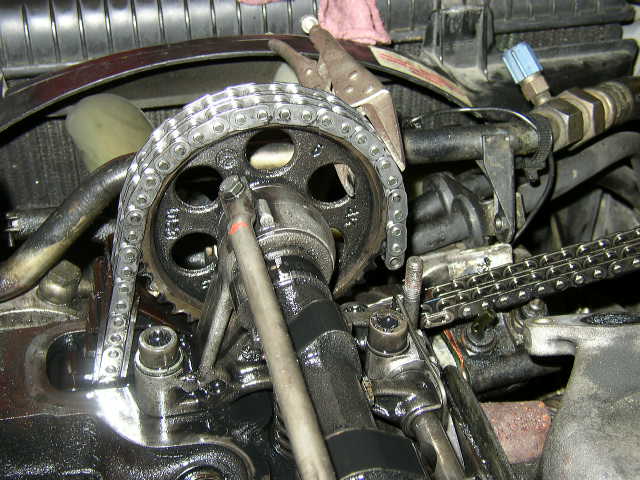
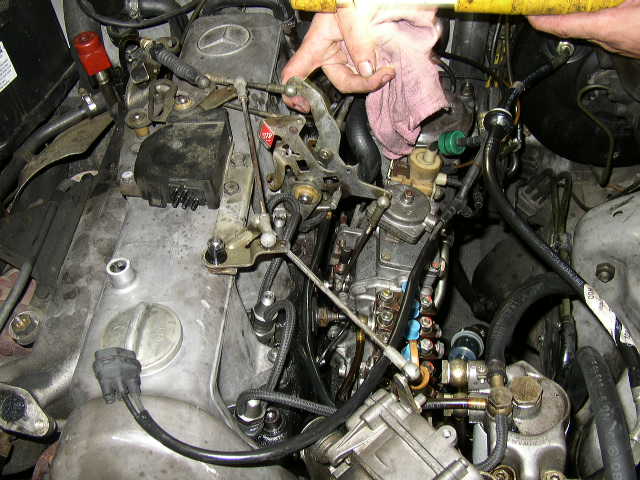
Everything is secure and ready to be rolled in. Your helper will guide the old chain out and hold the new chain on the sprocket. Don't forget to remove the rags for the rotation portion of this exercise.

When releasing the vice grip, make sure the helper has his hand on the sprocket just like the photos. One of the helpers hands is on the sprocket, his other hand has the old chain pulled tight. NO SLACK IS ALLOWED! If slack gets in the old chain it can come off the crankshaft sprocket, then time to remove the engine. Make sure you get your game plan with your helper before you release the vice grip.
One person is rotating the engine very slowly, the other is holding the chains......
All the way around and back to the beginning, with the old chain meeting the other end of the new chain. Secure the 2 vice grips at this point so the helper can let go of the chains. Then put all the rags back on the engine to prevent the pins or bar from falling in. Then take off the master link and throw the old chain at the cat. This is how the chain will end up if you did it right and did not get any slack or skip a tooth. If you did what I said earlier you should have no problem.

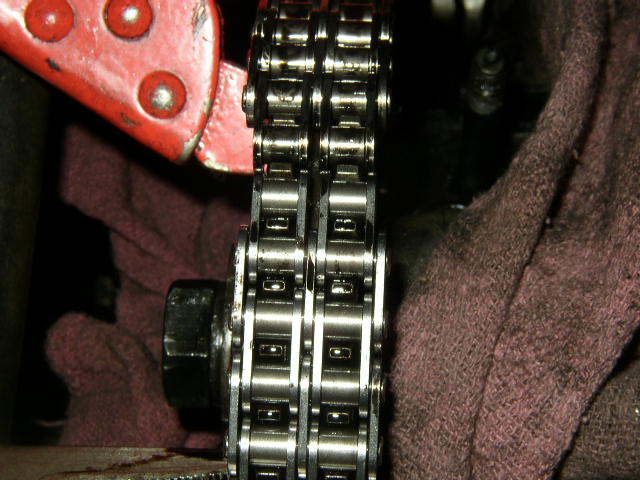
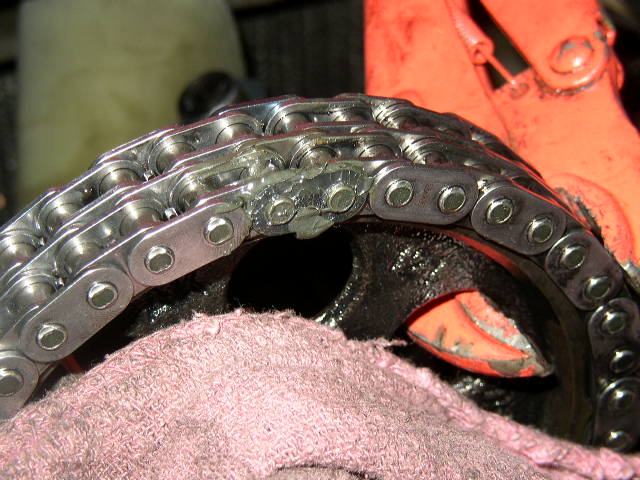
Install the new link to hold both ends together, just like the photo.
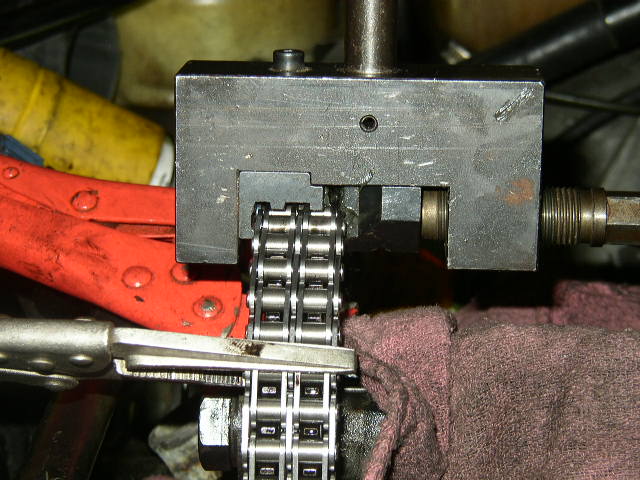
Then get your handy chain press and secure the chain. Using this tool ensures the link you just installed, will NOT come off for another 200k. The pins should be mushroomed just like all the other pins in the chain. Don't use 2 ball peen hammers to press the pins. It is just not worth having the chain come apart and ruining your engine.
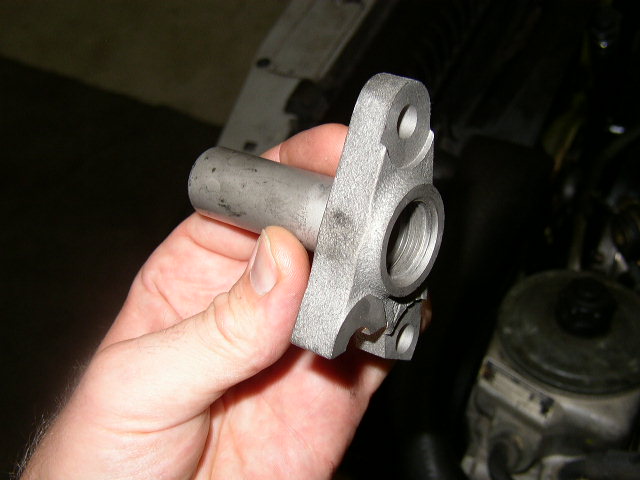
Now get your new tensioner and install it into the block. I don't recommend you use the old one at all.
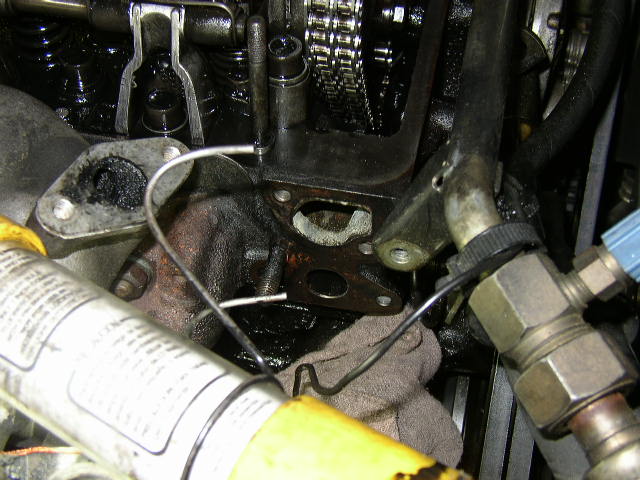
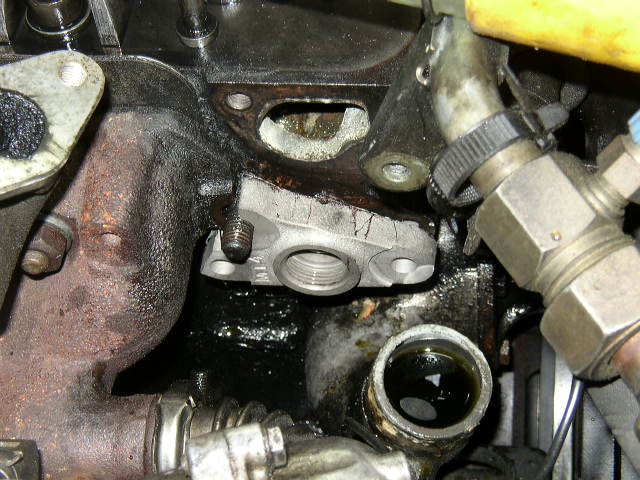
Install the tensioner in the block after cleaning the gasket surface.

Install the new spring and bolt assembly.
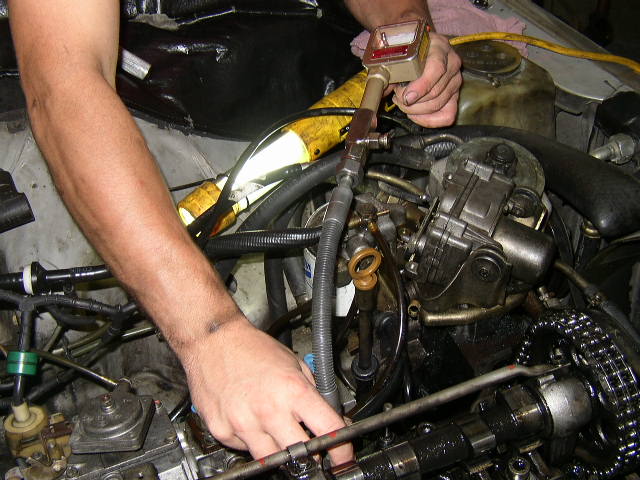
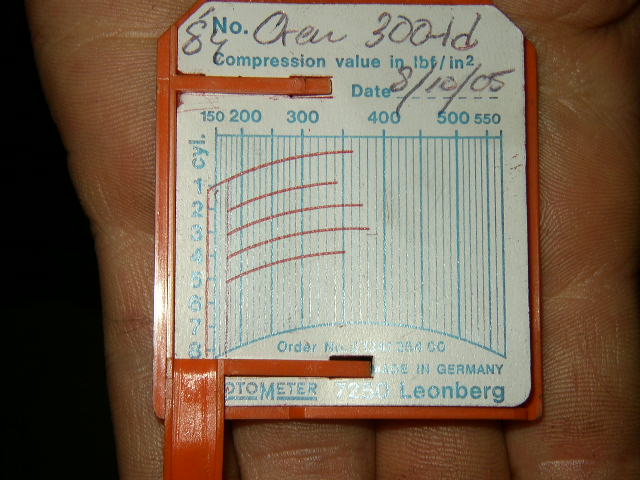
After the valves were adjusted, a compression test was done to check the health of the engine. Mat has a super cool compression tester that prints out for each cylinder. This gives you a very accurate and permanent record of the results. The test was done on a cold engine, with results not too awful for 270k miles. The engine is getting a little tired, but with good maintenance and care will go another 200k. Mat really has some cool factory Mercedes tools. I guess that is why he is the "Masta".
Reinstalled new injectors and washers, fuel lines, reinstall the valve cover and all the associated "stuff" that was removed. Standard procedure for bleeding fuel system. Crank for oil pressure before starting. Gives the chain some good lube before it is called on to serve.
I hope that this pictorial has encouraged you to jump in and get this job done. It is not really hard, you just have to be careful and have a helper with you.
If you enjoyed this pictorial drop me an email and let me know.