|
Mercedes Vacuum Troubleshooting Basics
|
| Home |
| Bio diesel and WVO page |
All parts used in these pictorials are available at the diesel parts for sale page
Mercedes Vacuum Troubleshooting Basics
Vacuum, vacuum everywhere, or you wished it was. To many owners of the older Mercedes diesel cars, the vacuum system continues to be an amazing mystery. Full of weird components and even weirder operation of all kinds of stuff on the car. Well I am here to tell you today, it is not that complicated and mysterious. To be quite frank, vacuum systems are much easier to both understand and troubleshoot, than an electrical system is.
The purpose of this pictorial is not to troubleshoot the entire car. I will eventually do the entire car for you in several different pictorials. My main focus is the most common areas that I hear questions on, especially around the oil filter housing. This critical area is where most of the leaks are going to happen. Why you ask? Because most cars are running around with the original connectors and check valves, that have swollen and hardened because of oil vapors and heat from the engine compartment. Combine that with years of moving and bumping the lines while taking off the oil filter housing top, and you have a recipe for a leak. Nothing will destroy a rubber vacuum component faster than motor oil. It swells the rubber, makes the connections loose and then bingo, leaks.
So follow along as we hunt down some vacuum leaks.....
Safety and security tips:
Please remember to recycle all your used fluids at an appropriate recycling center. Be mindful to not spill or splash fluids on yourself, others or the ground. Also as a safety tip please remember anytime you are working on, around or under your car, to wear safety glasses and secure the car with wheel stops and approved jack stands!
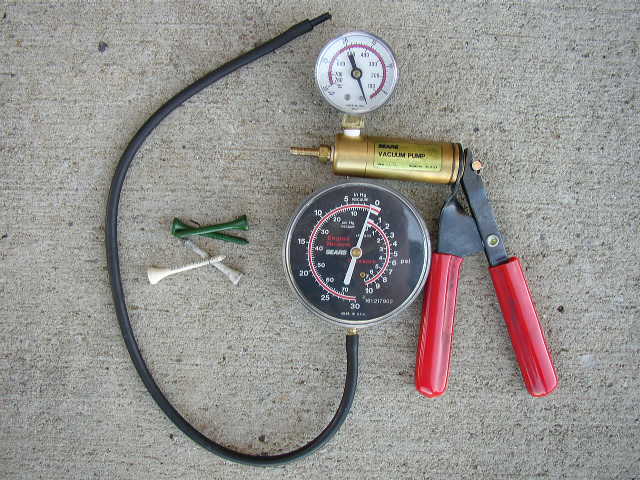
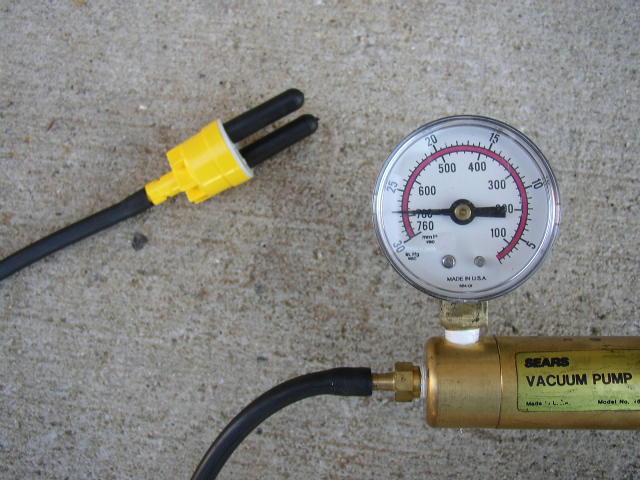
Tools of the trade. You must have at least one vacuum pump to properly diagnosis your system. Don't get the cheap plastic hand pump they don't last. I like the brass Sears model for longevity. Also invaluable is a standard vacuum gauge. Many times on several of the tests I perform, I will use both gauges at the same time. Don't skimp on these tools, they don't cost that much and will pay for themselves the first time you use them. Oh I almost forgot one other tool, golf tees. These are invaluable in plugging lines for testing. I have lots of them handy when I am on the hunt for leaks. They are easy to use and slip in and out of the connectors easily.
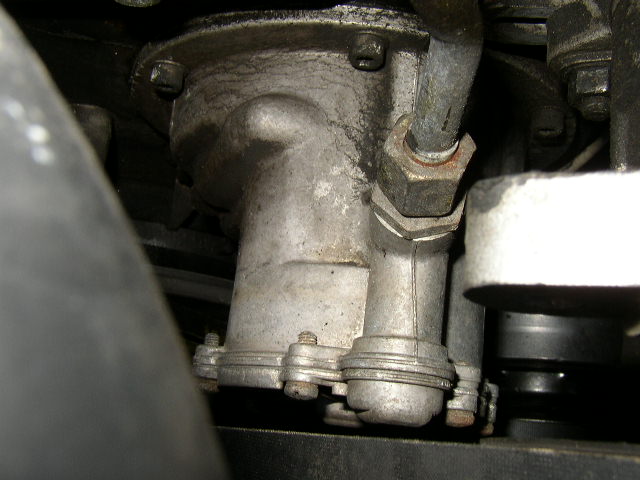
Typical Mercedes diesel vacuum pump. They are very reliable and easy to rebuild if need be. The most common failure is the check valve and internal diaphragm.
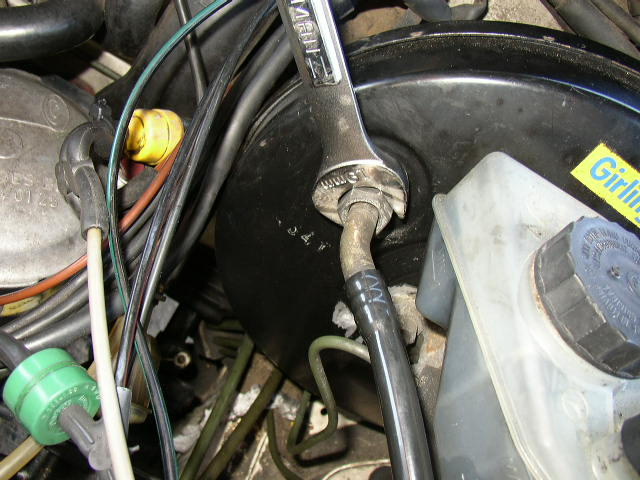
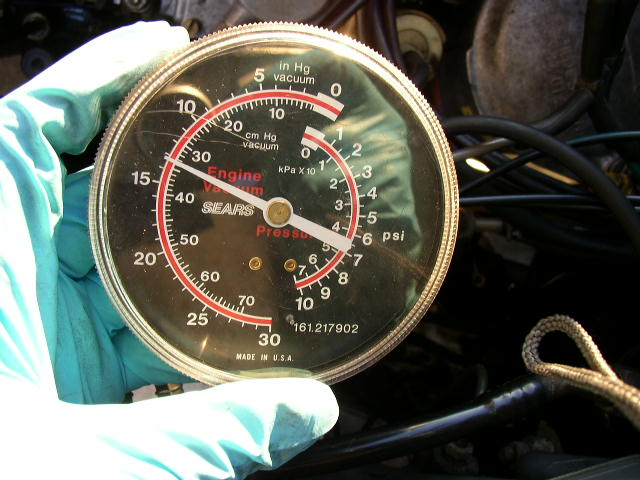
The very first thing I do is make sure we have a constant supply of vacuum. Disconnect the main fitting going to the brake booster while the engine is running using a 19mm wrench.
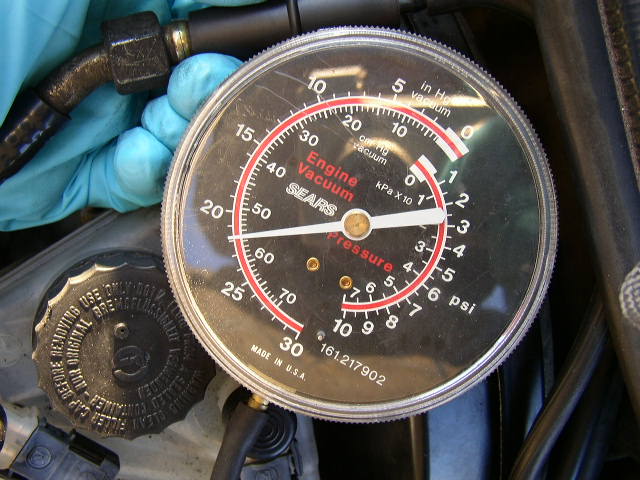
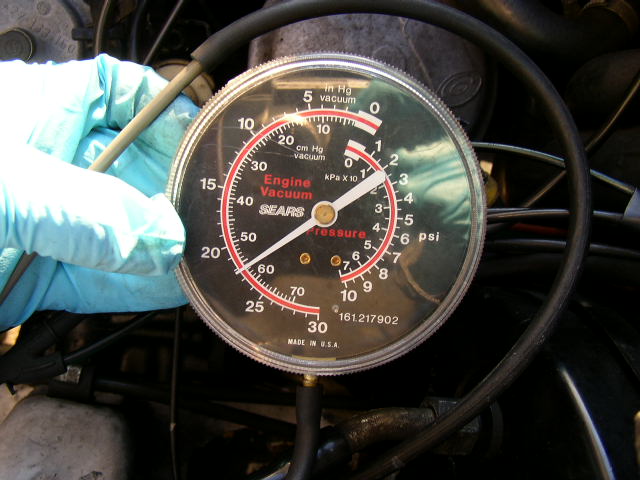
Hook up your vacuum gage to the end and read the vacuum. As you can see we have a nice 22 hg of vacuum. The vacuum is actually a little higher than the gauge reads due to the fact that I am just pressing the hose against the opening and I can't make a perfect seal. This tells us the vacuum pump is working properly. If you had no vacuum or it was low or erratic, then you will need to check your vacuum check valve and/or rebuild your pump.
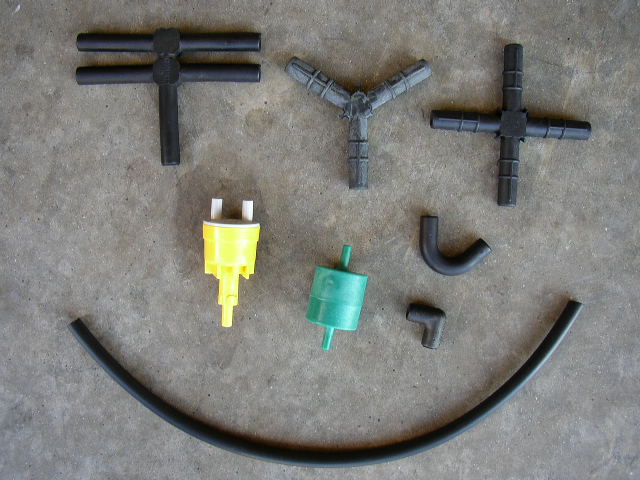
Since the most cars have the original vacuum components, I will be showing you how to replace the connectors and other items with the dieselgiant Master Vacuum Connector kit.
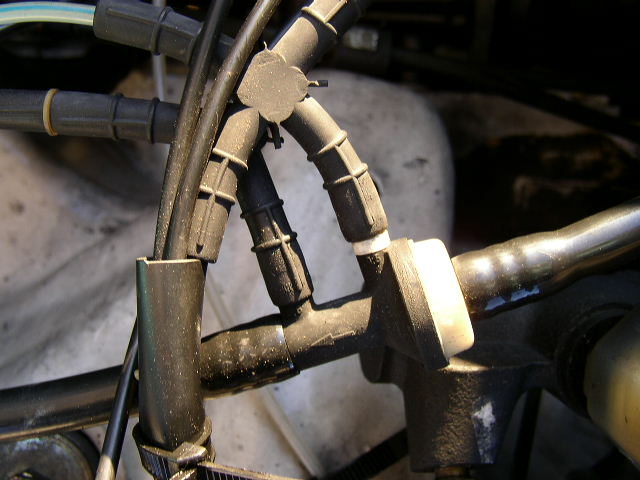
Another area of great leakage is the metering valves on the main supply line. There is a 3 way and 4 way connector on the valve. Be very careful removing the 2 connectors from the supply line metering valve. The nipples are small and very fragile and prone to cracking. If one breaks you will have to replace the entire line. Its not very expensive, but if it is not is perfect condition, then it will leak.
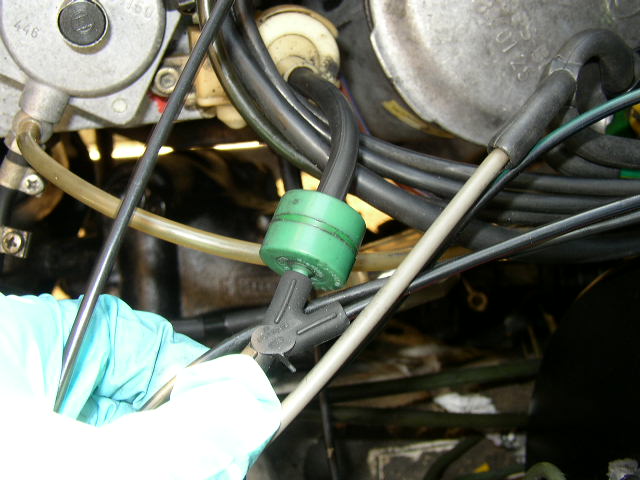
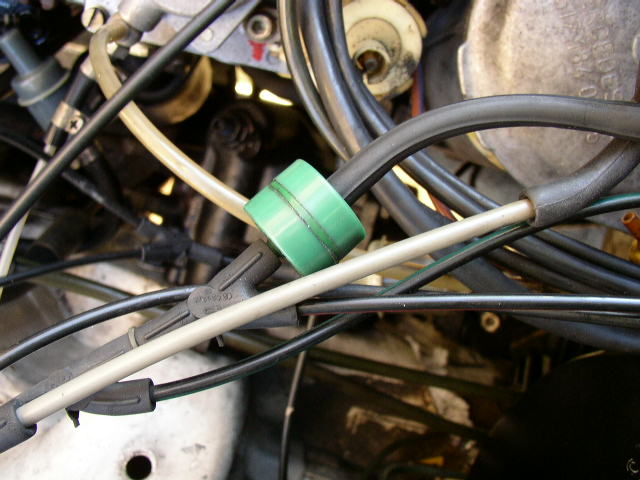
Next is the green vacuum dashpot for the transmission. This is simply a metering device to supply the correct vacuum to the transmission switch. If the dashpot is leaking or not functioning, then transmission shifting can be very rough and erratic.
I disconnected the supply side of the dashpot to ensure it is getting proper vacuum and hooked my gauge into the connector that the dashpot was occupying.
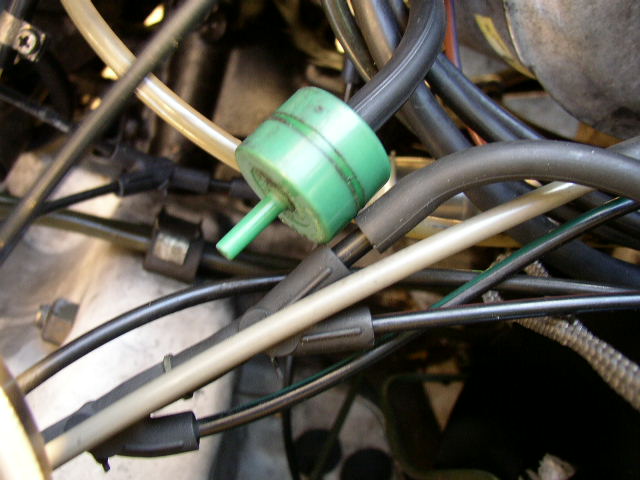
The dashpot is getting proper vacuum. Why is this reading lower than the supply line? Because the dashpot is being supplied by the 3 way connector and that is connected to the metering valve in the supply line. The metering valve is designed to restrict the vacuum going to this area.
Replace the dashpot and the connector if necessary.
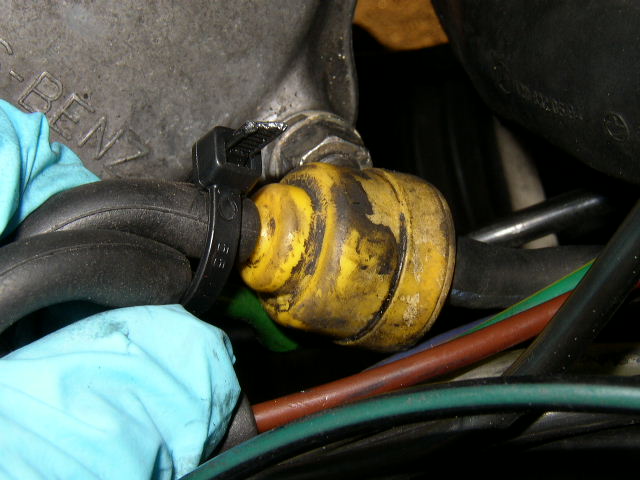
Next we turn out attention to the big culprits to vacuum leaks. The door lock check valve. If this is leaking then the doors may work slowly or not at all. It will also allow the vacuum reservoir to leak down when the car is parked.
If you want too, you can test the valve by hooking up your hand vacuum pump to the supply side and blocking off the 2 outlet nipples, but I would just go ahead and replace it since its in the kit. Replace the 2 one inch pieces of vacuum attached to the check valve also.
To test the yellow lines, hook up your hand pump to each line with the other blocked off, and see if you can pull and hold a vacuum. If not then you may have a master vacuum switch or one of the door lock actuators leaking.
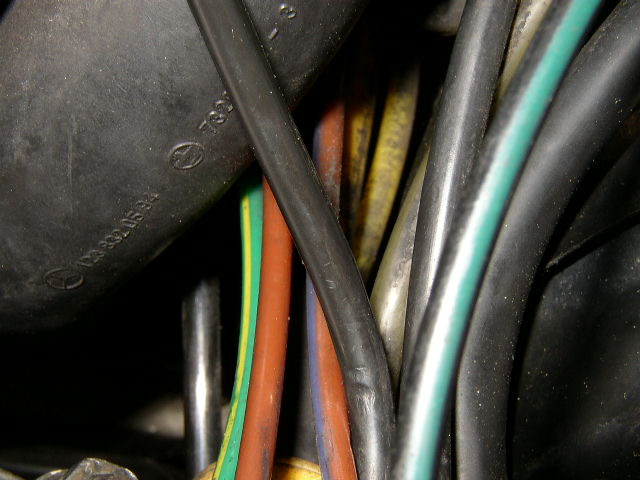
Now you will see a lot of different colored vacuum line coming though the firewall, what are they?? Well different year cars have some differences but these are the main ones. The 2 yellow lines going to the check valve is for the door lock system. The solid brown line is the ignition switch supply line. The brown with blue stripe is to the fuel shut off valve. The green with yellow stripe goes to the HVAC system. The baby blue line supplies the seat back restraint system on 2 door models. The black line supplies the vacuum reservoir tank.
Please note that you need to check the green line with the yellow stripe. This line is the most common line to have multiple leaks due to all the dash pod units controlling the HVAC system. If it leaks, just plug it off for now. In another pictorial we will tackle the HVAC system by itself.
Also check the black line with your hand pump. This line is the supply line for the vacuum reservoir and will need to be addressed if it won't hold vacuum. The reservoir is located in the truck on the sedan models and behind the drivers front fender on other models.
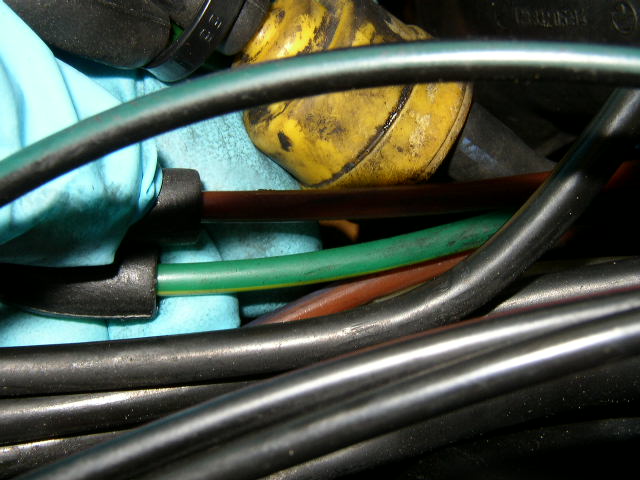
Closer view of the lines.
Now we will check the supply to the check valve. This side will have full vacuum since it is supplying most of the lines that come through the firewall. We look good here.

Test each outlet on your connector. I have already replaced this connector and just verifying that there are no leaks. Keep in mind when testing the vacuum system, you will need to test before the suspect component and after it. Then just keep moving downstream, until you find the leak. Use your golf tees to block lines for your test. Use you hand pump to test the various check valves and to pull vacuum on actuators, reservoir, and other moving mechanisms.
In the case with this car the main culprit was the 5 way connector. It was original and swollen with oil vapor and did not grip the lines very well. A new connector is VERY hard to get on the lines, that is what keeps vacuum leaks away.
Well I hope that I have given you enough info to be able to test and repair this trouble area in the vacuum system. Keep in mind there are a lot of other components and systems on your car we did not address, but you now know the basics, so go forth and stamp out vacuum leaks.