|
Mercedes Diesel Glow Plug Repair/Upgrade for the loop style plugs |
| Home |
| Bio diesel and WVO page |
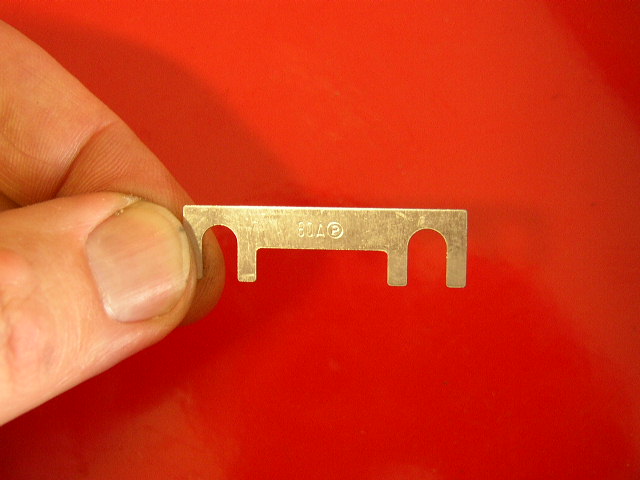
All parts used in these pictorials are available at the diesel parts for sale page
Mercedes Diesel Glow Plug Repair/Upgrade for the loop style plugs
I see an awful lot of questions on the older loop style glow plugs. These glow plugs were common on the non-turbo Mercedes engines. For those of us that ride around in in an older Mercedes diesel with the loop style plugs, this pictorial is for you. I had recently changed the glow plugs on a '79 300d that had failed. At that time, I opted NOT to upgrade the loop style plugs to the newer "pencil" style. Mostly because I was too lazy to think about the process, and just wanted to get the job over with. Well one afternoon I was tinkering around with the '79, and left the key in the ignition, with it in the on position for several hours. Now this would not be a big deal, but my glow plug relay stuck ON! Well one does not have to guess what happened. No the car did not catch fire, but I did burn out my strip fuse.
I went to start the car and I got no glow plug light, and the car would NOT start! Follow along with me on a quest to get to the bottom of this mystery and do it right this time......
Safety and security tips:
Please remember to recycle all your used fluids at an appropriate recycling center. Be mindful to not spill or splash fluids on yourself, others or the ground. Also as a safety tip please remember anytime you are working on, around or under your car, to wear safety glasses and secure the car with wheel stops and approved jack stands!
The very first thing I did was to check to be sure the relay was energizing. The relay on the older non-turbo models is NOT in the engine compartment, but under the dash. I removed the drivers knee panel under the steering wheel....
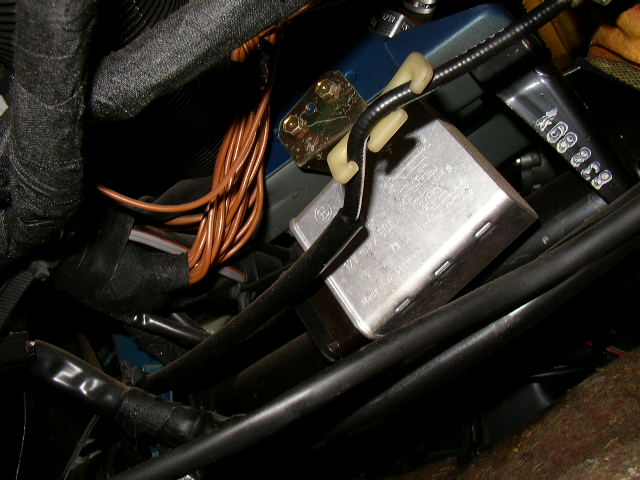
The glow plug relay is the silver box slightly left of the steering column. Turning the key on, I could hear the relay clicking on, and turning the key off I could hear it click off. The relay does not turn off by itself if the key is left in the ignition, and not turned to start. This is what fried my fuse and plugs. The relay has a built in timer to turn off the power after a preset time, and after getting a resistance value from the temp sensor in the head. This relay needs to be replaced for the timer to work properly. ** Note to self replace the relay!
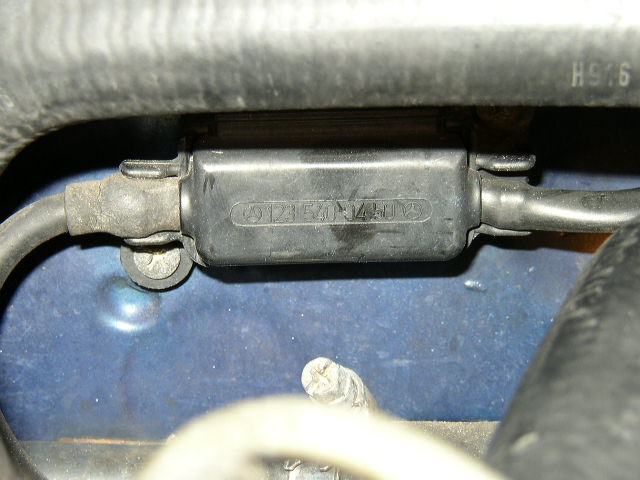
Next I went looking for the glow plug fuse. It is located on the firewall in a small plastic holder. Just look at the number 5 glow plug and follow the wire to the firewall, and that is the fuse location......
Snap open the little plastic cover and it reveals the fuse and attaching screws. This fuse was burned in half, so I replaced it with a brand new fuse.
This is a close up of the fuse out of the holder. If in doubt replace the fuse, they are not that expensive. After replacing the fuse and turning on the ignition to the glow plug cycle, I checked to verify that I had power on both sides if the fuse. I did. So on to the glow plugs.
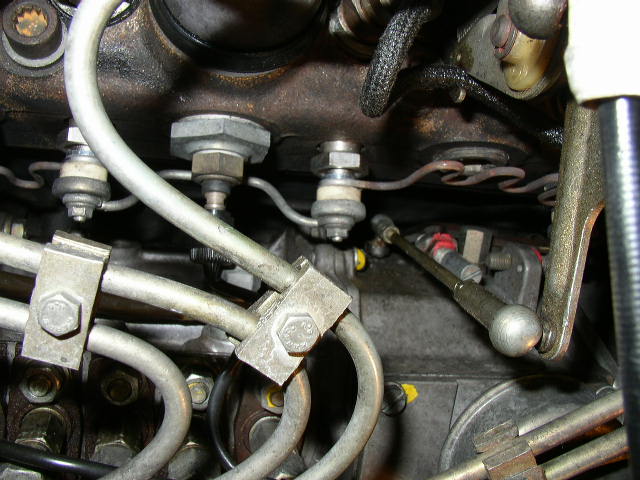
These are the older loop style plugs in the engine. As you can see they are much larger in diameter and are wired in series, not parallel like the newer style. Since they are in series, if the plug number 5 fails then none of the others will work. They are also easily identified by the metal loops going to each plug. These plugs work well when they are new, but as we will see there is a way to make them better.......
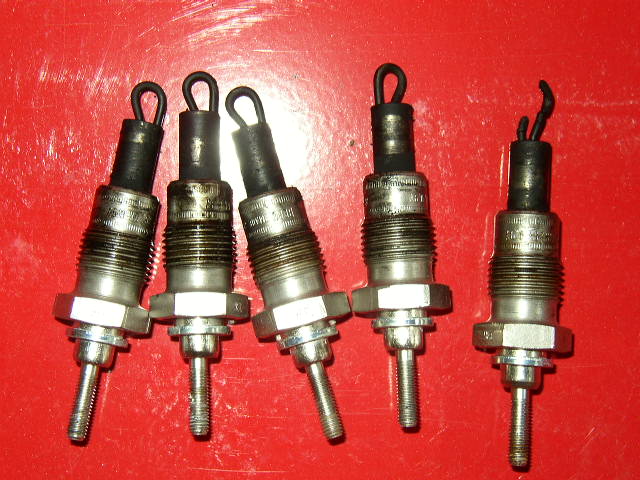
I removed all 5 glow plugs and look what I found. The number 5 plug was burned in half at the loop. Since no power could go to the next plug, none of them worked. This is called a cascade failure. This is why I don't like any electrical device powered in series. The power of one depends on the reliability of the one up stream of it. Wiring the plugs in parallel is much better, since they all get power at the same time, and if one fails the others work independent of the failed one. These plugs are only a month old. A stuck relay, and me forgetting to remove the key, caused the car to not start.
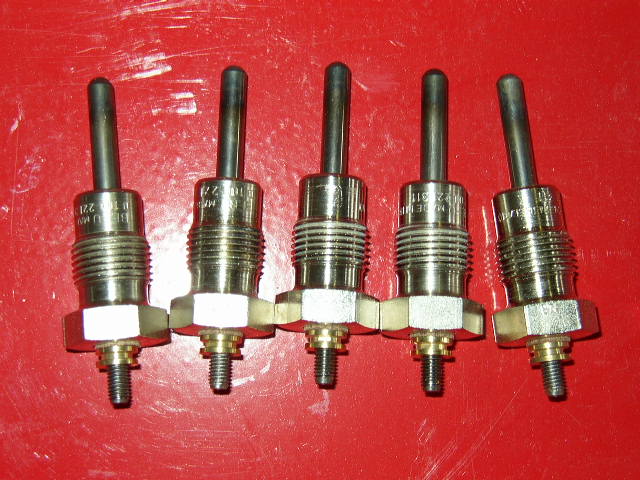
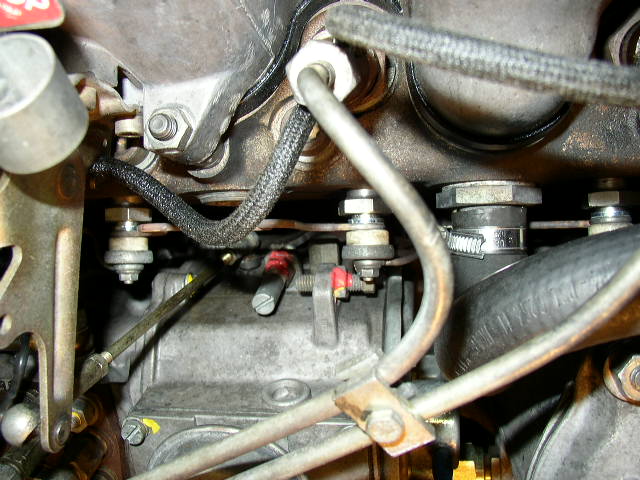
These plugs are the updated pencil type, with the old style loop body so they will fit in your head. Now you can't just put these plugs in, we need to update the wiring. These tips will last longer, handle more amps and heat up much faster, even without changing your relay. Most relay changes are for the "after glow" feature. This means the relay will cycle the glow plugs, even after the engine is started for a preset amount of time. In my opinion this is not normally necessary, and will save you some big $$$ by just using your current relay.
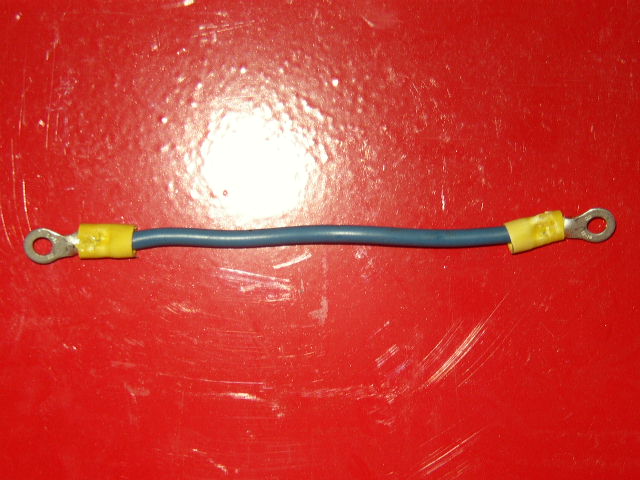
This is the connector wire that I made. I used 10 gauge with the appropriate sized ends. Do NOT use any smaller wire, it won't safely handle the amp load. I made a wire to connect to each plug end. Remember to remove and NOT use the ground strap that was on the original number 1 cylinder plug. It is a thick braided steel cable that bolts to the head. If you connected that with this style parallel wiring, you would blow a fuse instantly.
Here is a pic of how the wiring works. Connect one to the other and to the other etc. If one of the plugs fail, the power will still flow to the other plugs downstream, because the power wire is touching the next wire on the next plug. Its like having a separate wire running to the power for each plug.
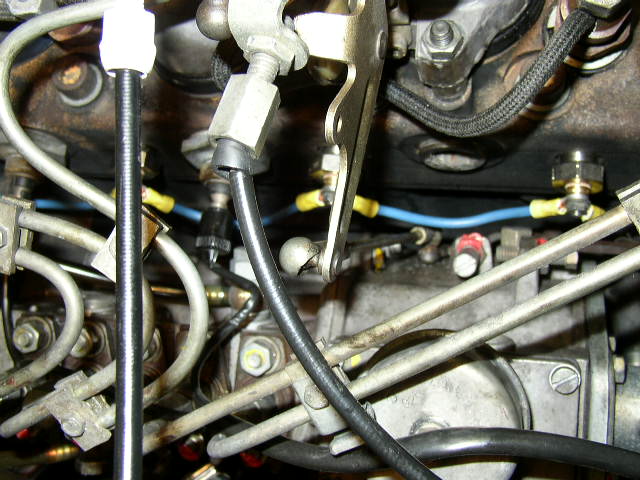
This is the number 1 plug. You can see the ground strap that was used to connect to the older loop style plug, to the left of the plug itself. I just folded it out of the way. Do not attach it to the plug. The plugs get their ground via the plug contact with the head. The wires carry the current to each plug. Attaching the ground wire to the plug is very bad! I hope I have driven this point home.
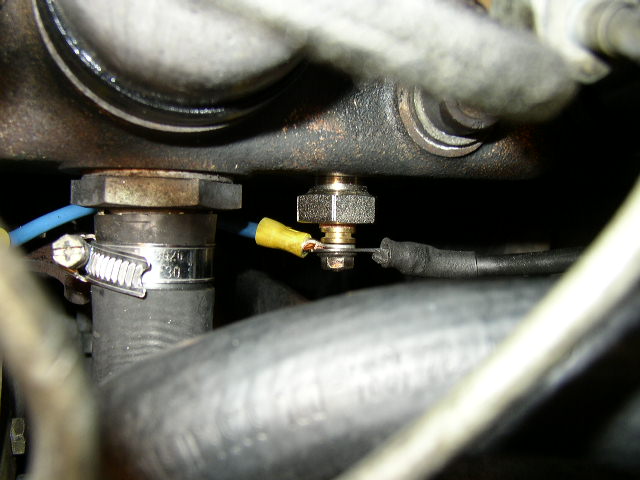
Here is the number 5 plug. The power wire from the strip fuse is the large black wire you see on the plug.
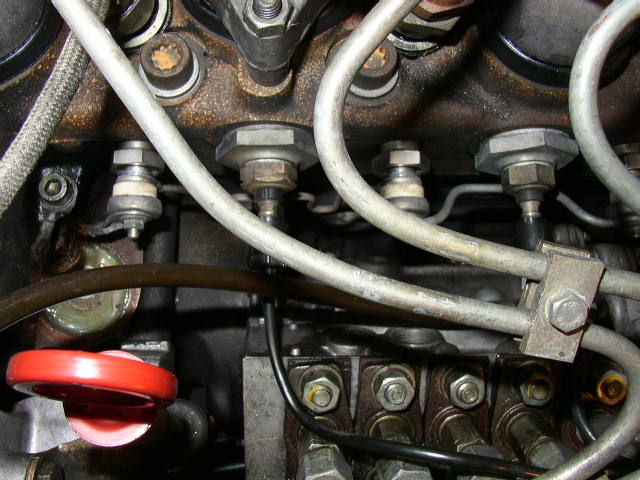
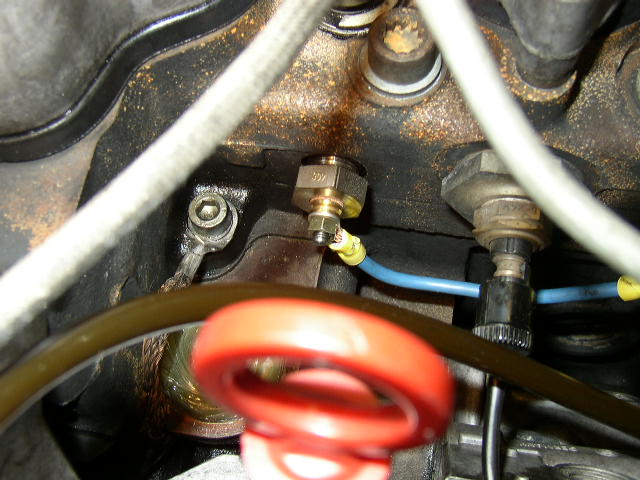
One more view of the OLDER set-up. See how much different it is?
Now after I double checked everything, I turned the key and wow the glow plug light came one. After about 20 seconds, the light went out and I turned the key. I can only say I wish I had done this sooner. The engine was stone cold when I started it, and it never started so nice. The key to the plugs.... they get much hotter faster, and that makes my engine smile.
Now get out there and upgrade those plugs!